Editing in GitLab
How to login to GitLab
Access to GitLab is provided through the Fablabs.io platform. All students will have had an account automatically created using the email address as registered by the student.
For most students, click the "fablabs" button to login using Fablabs platform.
-
On the GitLab login page, click the Fablabs button to start.
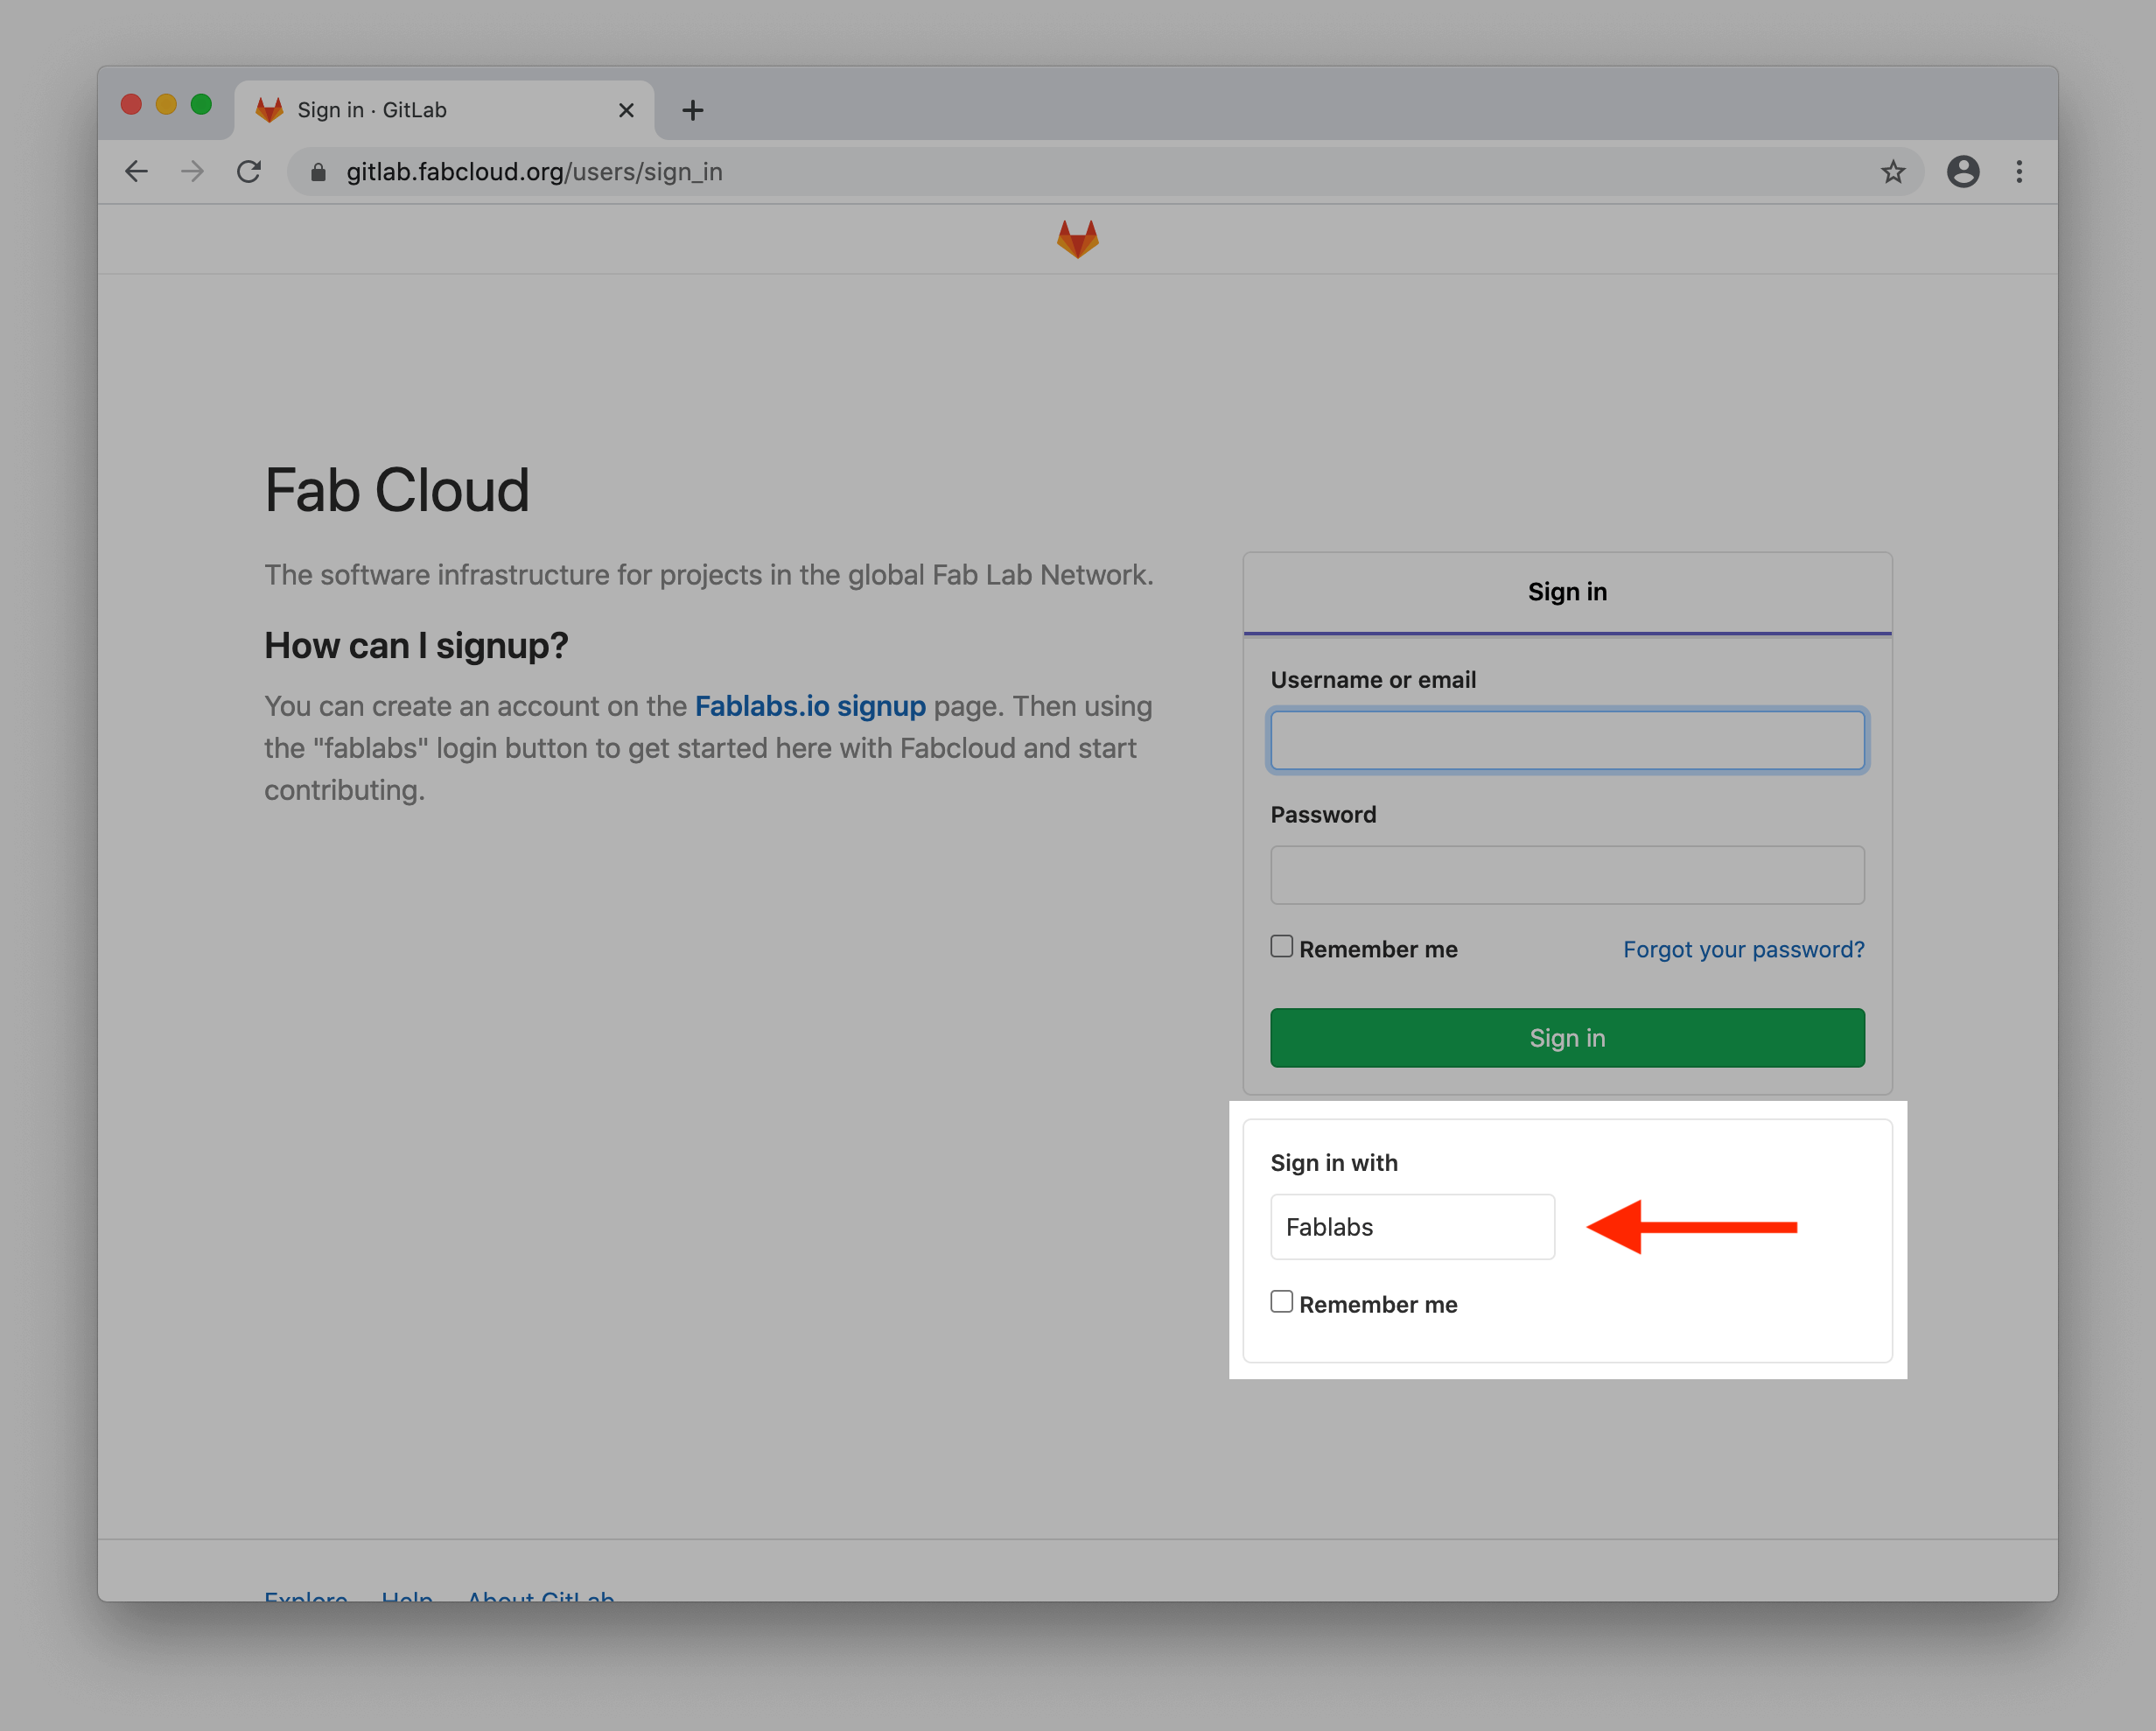
The GitLab username/password fields will not work unless you specifically have accessed this way before.
-
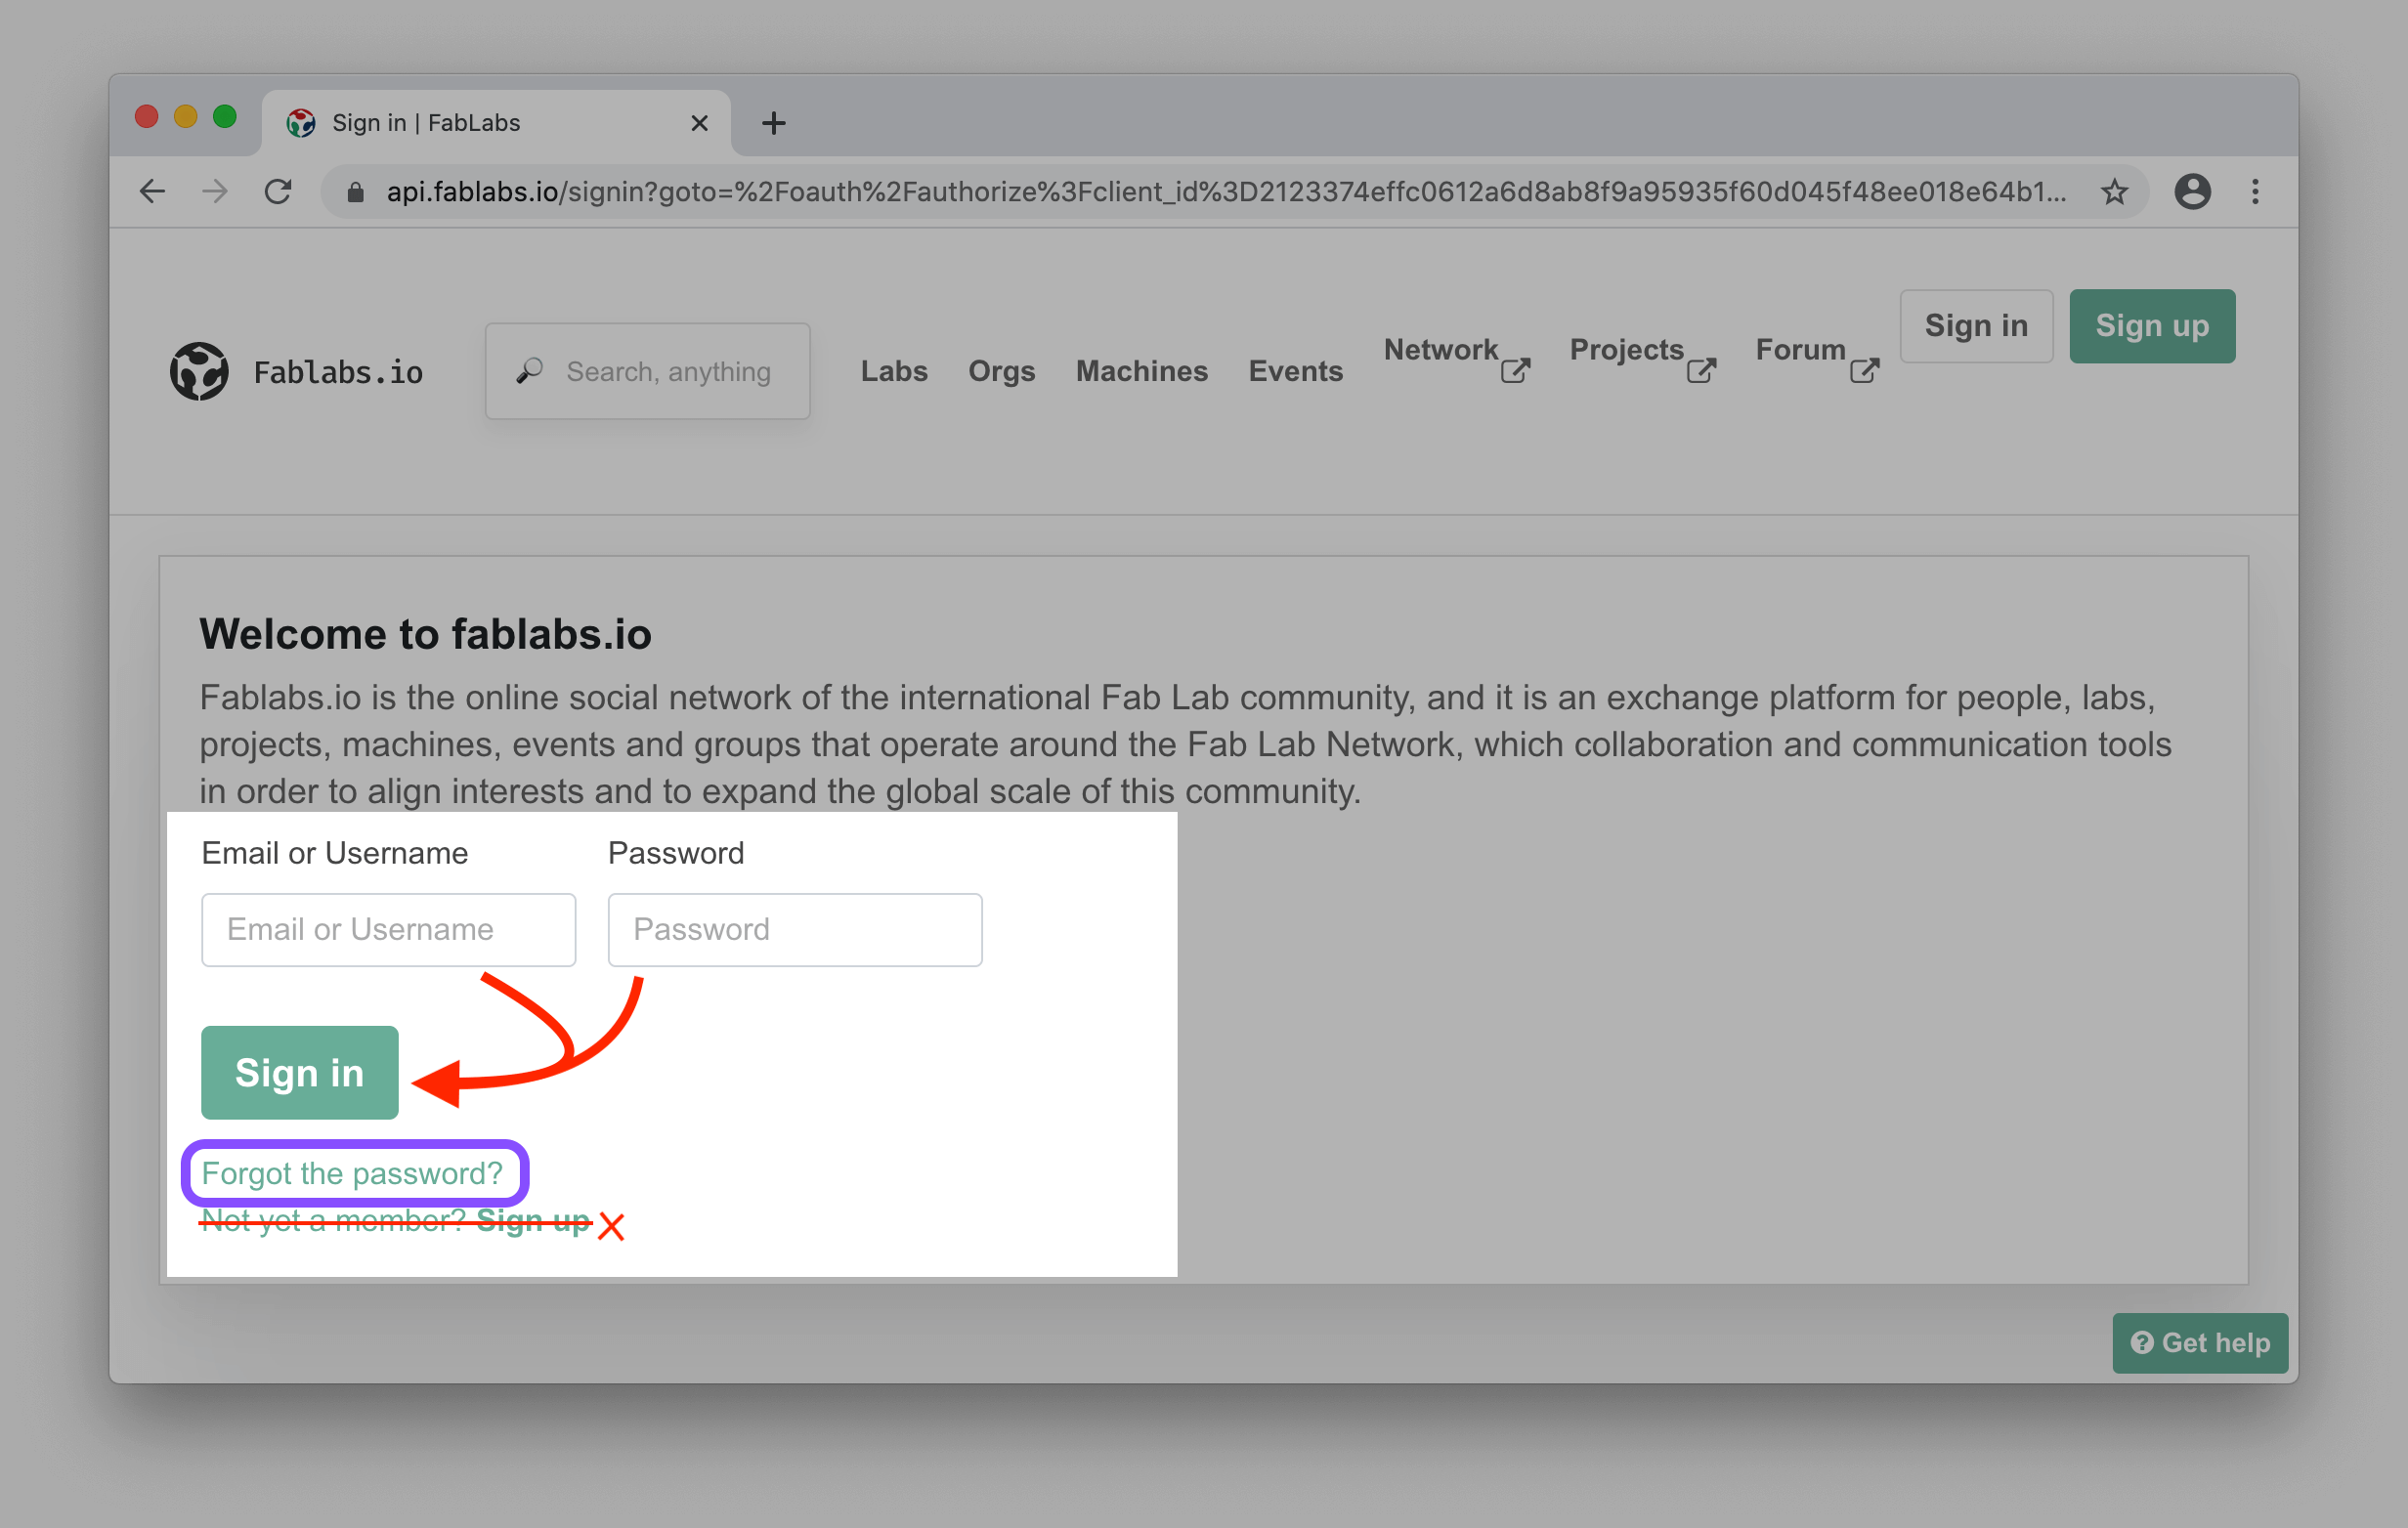
You will be redirected to Fablabs.io platform were you fill in your email/password. If you do not have a password, click the "Forgot my password" button.
-
You should get redirected back to GitLab after succesfully sign-in on Fablabs.io. If you did not get redirected, start with step 1 again, else if that fails again please contact the IT team to ask for help before trying other solutions.
Reset your password
Go to the Forgot My Password on the Fablabs platform and not the one on GitLab. All your login information is on Fablabs.io and GitLab will use that information to log you into your repository.
Using the Gitlab editor
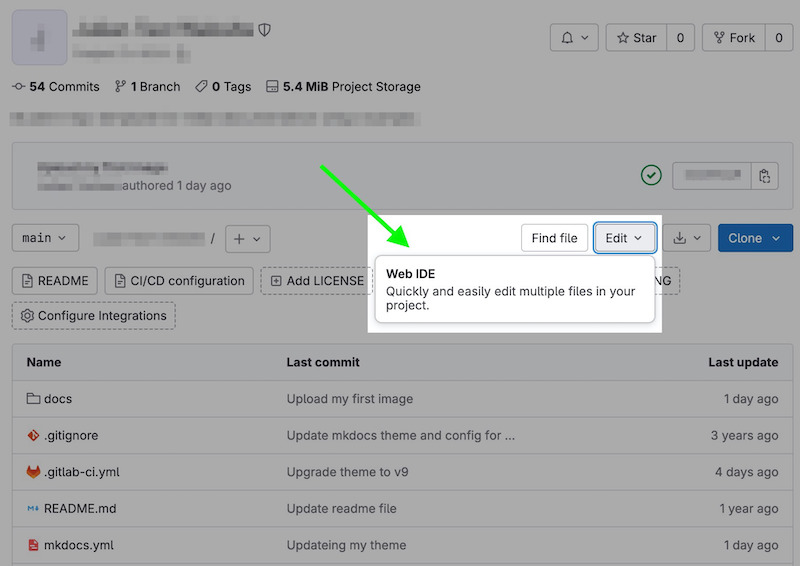
There are two ways to edit content in your repository, using either the "Web IDE" (recommended) or the "Edit" button.
-
The "Edit" button will show you an editor to change only that file you are viewing.
-
While the "Web IDE" button will open up a special editor where you can edit multiple files and/or upload files, after which you can then publish the changes by commiting all changes.
List of files
You can see the list of files in your git repository on the left.
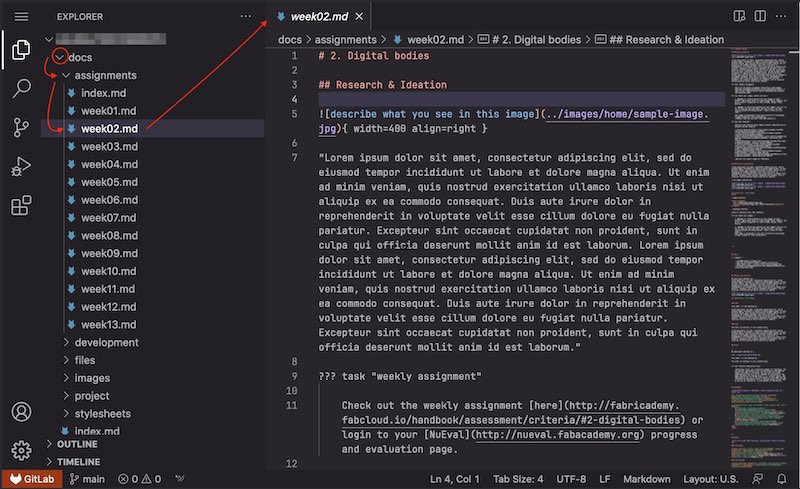
How to edit a file
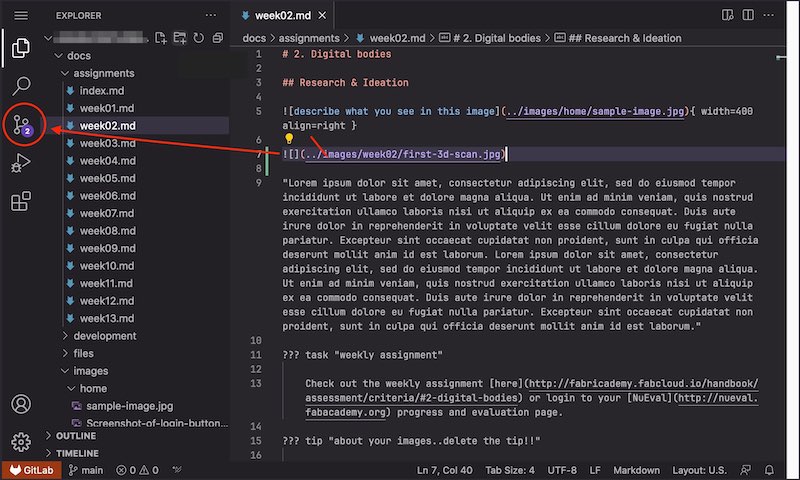
Using the left sidebar, find the page you'd like to edit. Clicking on the docs folder arrow to open the folders, just like on your computer. Then clicking a file will open a tab on the right side of the editor.
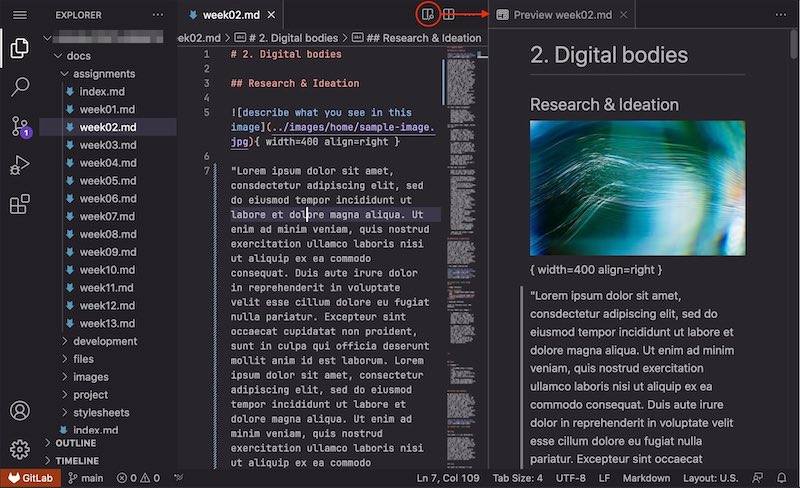
Preview markdown:
For .md extension files, you can also have a simple markdown "preview" tag. Tap the the icon in the top-right bar, as shown in the screenshot below. This markdown preview allows you to try out some of the markdown syntax. However not all the markdown, as some only work when compiled with MkDocs when publishing your website.
How to upload a file
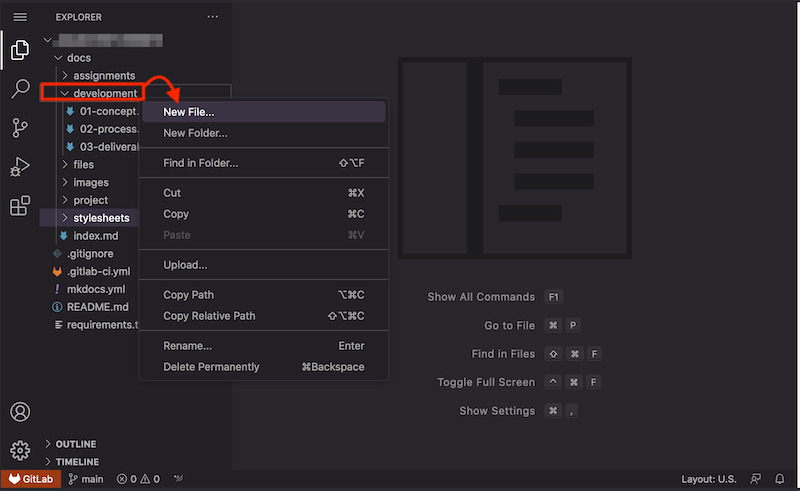
Navigate to the folder you would like to upload a file to and selecting the desired folder. Right-click the desired folder, then clicking "upload file" in the context-menu.

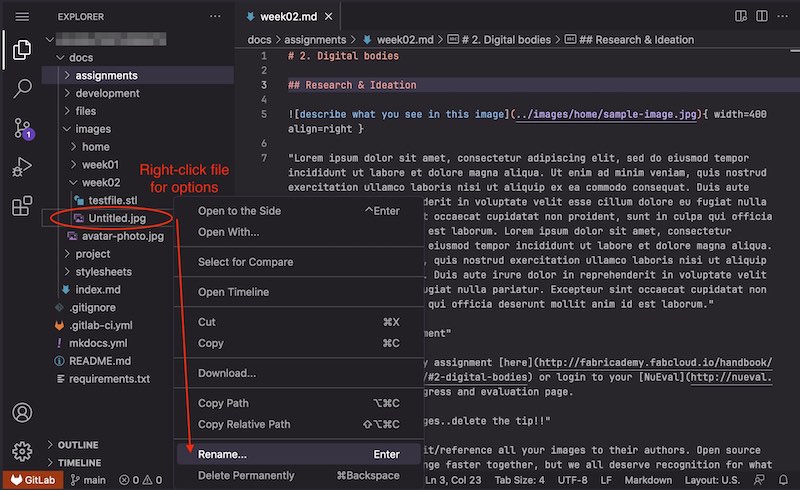
How to rename a file
Sometime after uploading a file, you may wish to rename the file to use a more descriptive file name to make clear what the image is when editing the Markdown files.
Right click a file, select Rename, and type your new file name in the sidebar. Click the Enter when you are down to save the new name, and do not forget to commit.
How to add a new markdown file
You can add as many pages as you want to your website. You will discover that adding a new page in the main docs/ folder will link it to the main menu. While if you create a folder and a page inside it, this will create a new menu.
Using the left sidebar, open the folder you would like to add a file to. Then right-click the desired folder and click "Add new File". Write the name of the file (ie. a markdown file would be docs/new-page.md).
How to commit your changes
After you have made all your desired changes (edit a file, upload a file, etc) you have to commit your changes to the GIT repository, which inturn get published to your website.
-
Open the "staging" area, to show you all the files which have changed or uploaded..
-
The files highlighted are your changed files, so you can double check the changes to your files you are about to commit. In the below example, we clicked 'week01.md' file, opening a new tab. On the left side is the file as the last time committed and on the right are the new change. Here seeing a new line was added.

-
Once you are ready to commit, write a short clear message on the top-left input box, describing what you changed. For example:
- "Change intro text on home page"
- "Added screenshot of 3d design to week01"
- "Updated week 01"
- "Uploaded a file"
- etc
-
Then click the red button called "Commit to 'main'". Do NOT commit to a new branch (unless you know what you are doing), otherwise you need to deal with a Merge Request.
-
Confirm you would like to commit to the default branch. Then you are done.
-
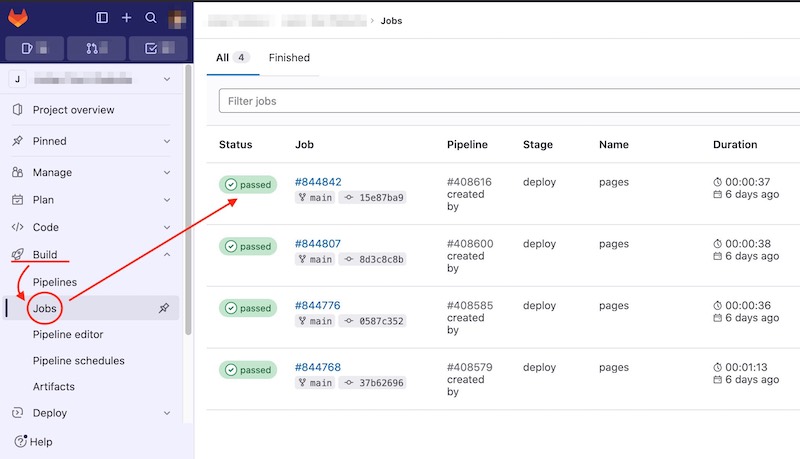
Back on your project page, navigate on the sidebar to the page pipelines or jobs. View the Job of your new commit, always the top (most recent) one, to make sure your the publishing tasks goes green, successful, meaning your website published your new changes.