Solutions and Concepts
01. Selected Solutions
After brainstorming and exchanging ideas with local weavers, our team decided to focus on the three issues that seemed the most pressing and the easiest to solve during the constrained time frame:
- Digitalizing the typical backstrap loom design, in order to standardize it and provide manufacturing templates that could be used by any carpenter around the country;
- Providing new adjustment possibilities to the loom, letting weavers easily change the position of the warp depending on their size, but also allowing them to quickly free themselves from the loom to take a break and stretch.
- Creating an assistive device that will support their back and provide a comfortable position for long weaving sessions.
1. Standard 3D design and manufacturing templates
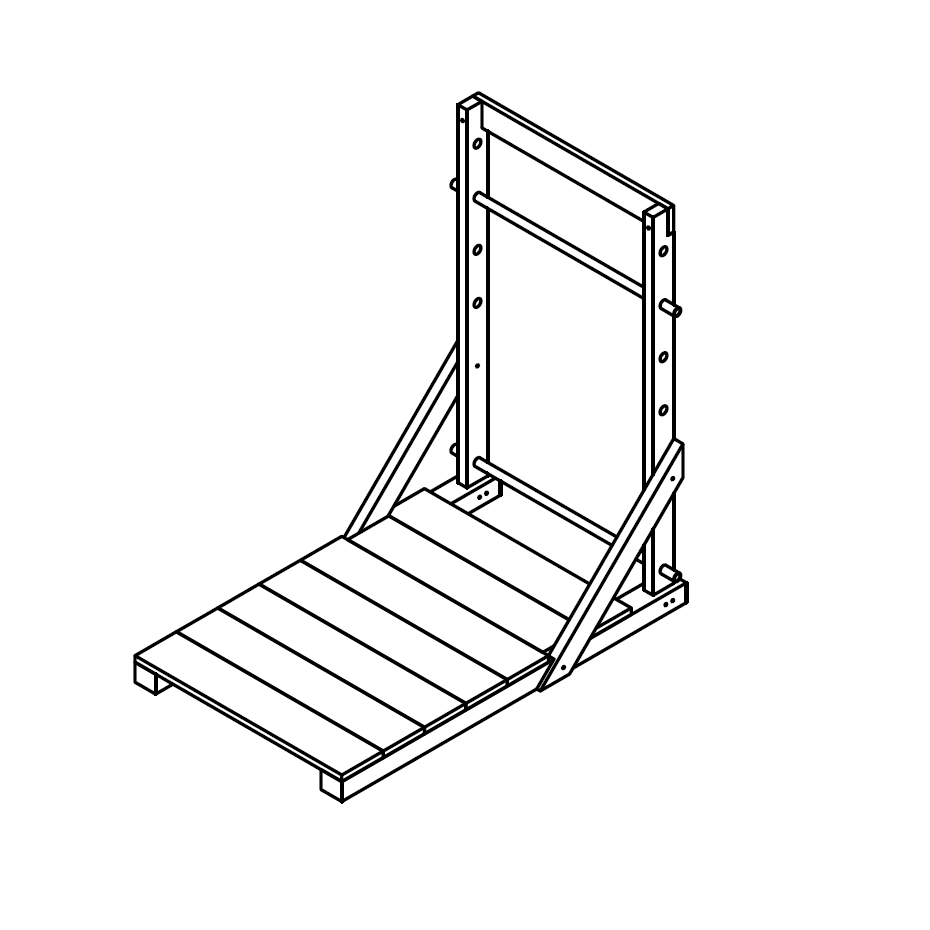
After taking measurements on many different backstrap looms and comparing the types of wood used, the dimensions of the beams and the joinery, the team designed a 3D model that would take the best features of each.
The model proposed here uses standard beam and plank dimensions, it is very easy to manufacture with the use of simple joints and identical parts and also integrates stronger assemblies.
In addition, readable blueprints for each part have been produced, offering the possibility to manufacture this loom without having access to any computer and or digital manufacturing tools.
2. Adjustable loom
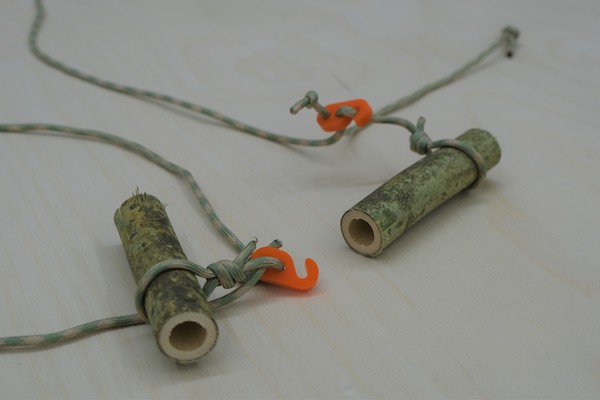
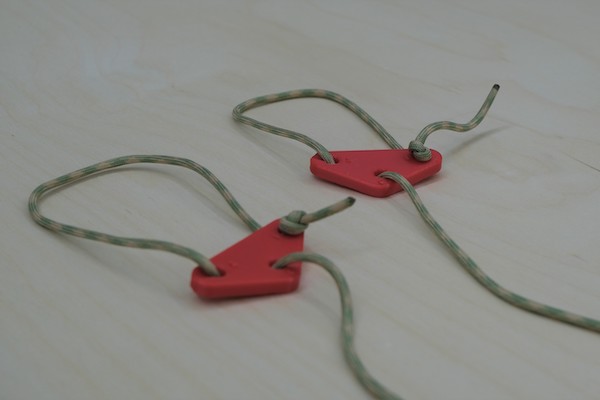
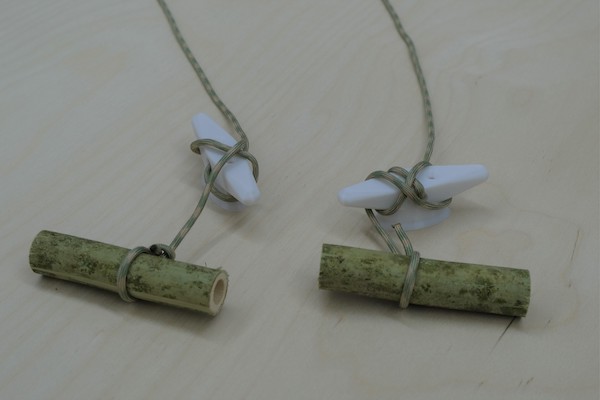
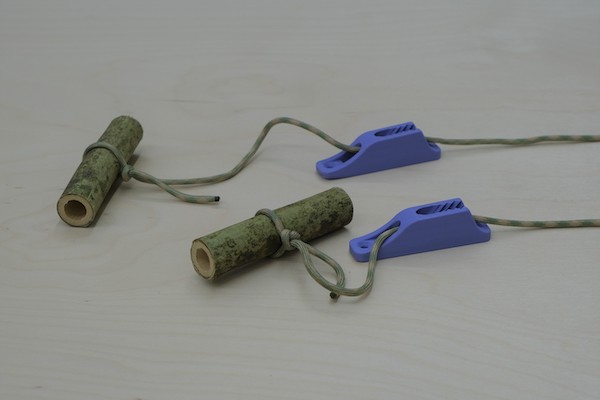
Many solutions were imagined to provide adjustment capabilities to the loom, mostly inspired by backpack straps and quick rope attachment systems used on sailing boats. You can see hereunder different systems that were tried and prototyped using 3D printing technology.
3. Assistive device
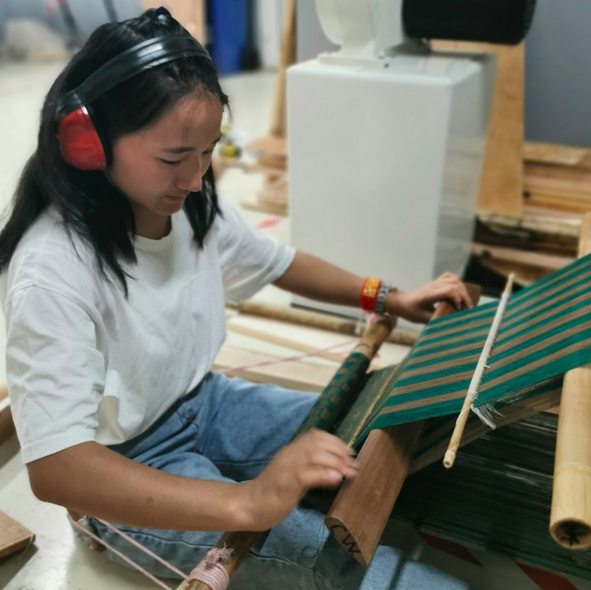
In order to create intricate and complex patterns, expert weavers have to do a lot of hand-picking. This requires the backstrap to be in tension 90% of the time, while they only need to loosen it 10% of the time when they change the shed. This observation led to imagining a reverse system, where the carp would be under tension in a default position and where the weaver would only need to move to loosen it once in a while.
Besides, it seemed important to provide a better seating position to the weavers and allow them to stretch, or move their bodies a little while working.
The imagined solution took the shape of a sliding chair, which would be directly connected to the breast beam. A locking mechanism is also integrated on both sides of the chair, using two eccentric clamps with handles, in order to secure the position with the right amount of tension.
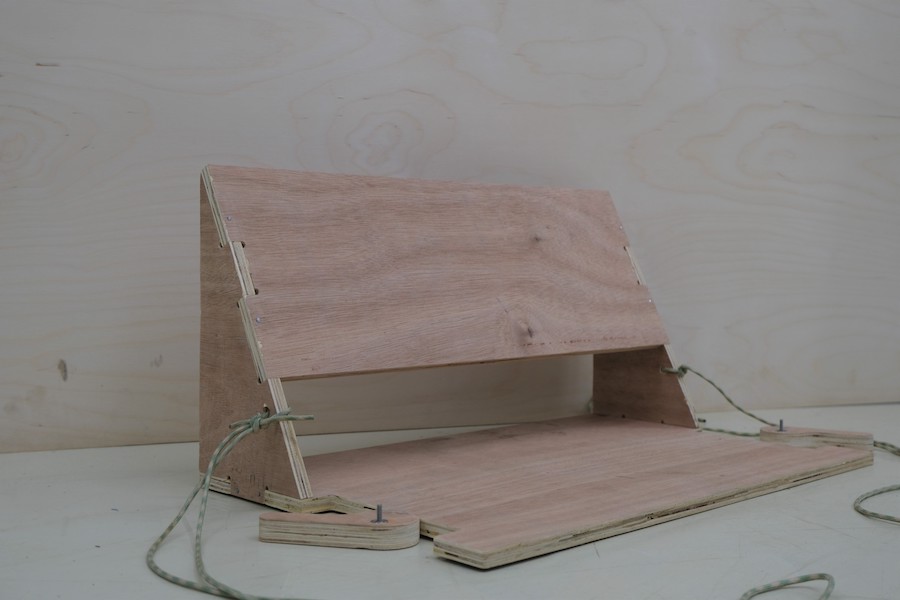
A 12mm plywood prototype was quickly manufactured on a CNC milling machine and tested by weavers the same day.
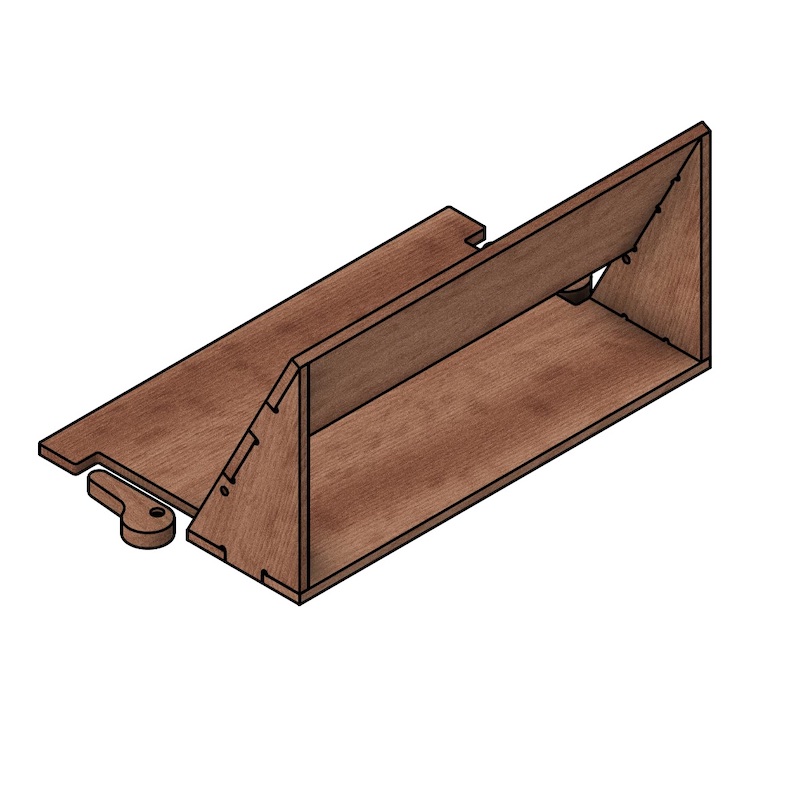
The key learnings from this first test were: Clamps aren’t really necessary; the weaver’s weight - in combination with the friction in between the wood surfaces - proved to be enough to maintain the right tension. Clamps might be necessary to maintain tension on a larger warp though. The back relief is great and the chair was comfortable, but too leaned back and too sharp on the top edge of the wood. The chair doesn’t slide straight and gets skewed after a while, a simple guiding system would be necessary.
Based on this constructive feedback, a second chair was prototyped, this time using a design that would reflect how local carpenters work. The chosen material was 1-inch pine wood, joints were simplified, the shapes could be easily cut by hand and could be assembled using nails or woodscrews. In addition to replicability, the design has the advantage of keeping the assistive chair at an affordable price.
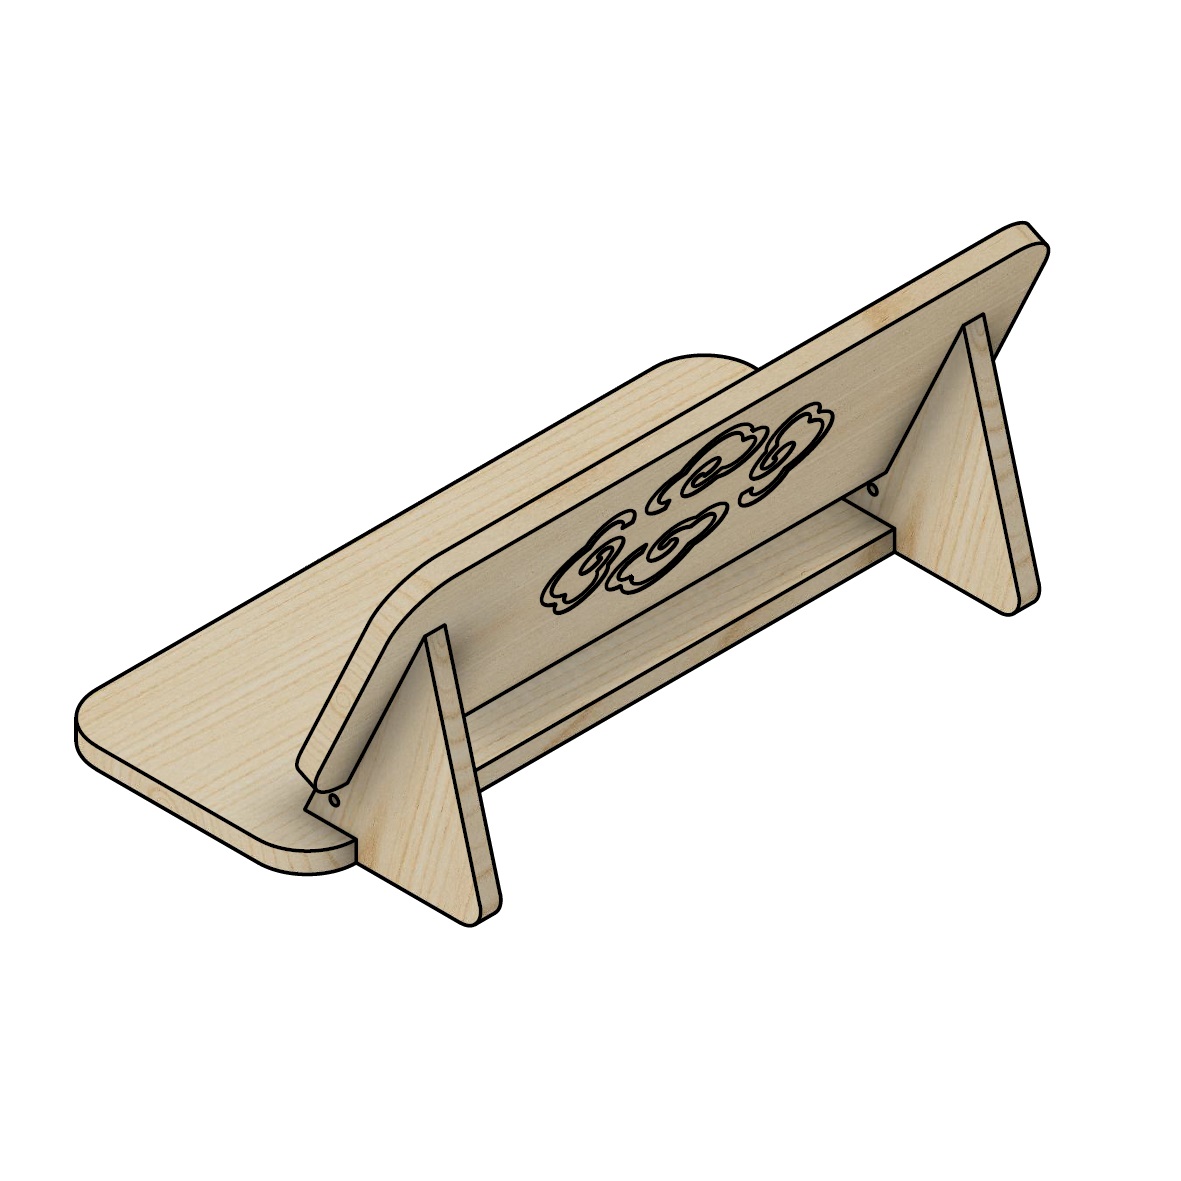
Regarding comfort, it was improved by sanding the edges and using curved lines on the corners. There was no time to add a flat pillow to the back, but that could be easily done in the future.
Lastly, another feature was added to this second version. The chair was designed to be wider and to accommodate an adult and a child together, for teaching purposes or simply to share a moment together.
Picture of prototype 02
02. Testing and Next Steps
Explanation of the feedback that was received during demo day.
Ideal solution: a combination of adjustment + chair with cushion and better sliding
Conclusion: Collaborating with weavers and skilled loom carpenters, we continue to evaluate and refine these solutions, aiming to find practical and effective enhancements that honour tradition and cater to the weavers' needs in this region.
Preserving Heritage: Traditional Weaving in Bhutan
Solutions:
In response to declining interest in traditional Bhutanese textiles, we propose a revitalizing solution – the introduction of new technology. Imagine Bhutanese textiles infused with conductive yarn, brought to life with lights, sound or change of colors. This harmonious blend of past and future sparks a renaissance, celebrating our heritage while embracing progress.
Prototyping
Description of the different V1 prototypes that were built for testing. Success/failure table.
Pictures of the building phase and of the prototypes
Preserving Heritage: Traditional Weaving in Bhutan
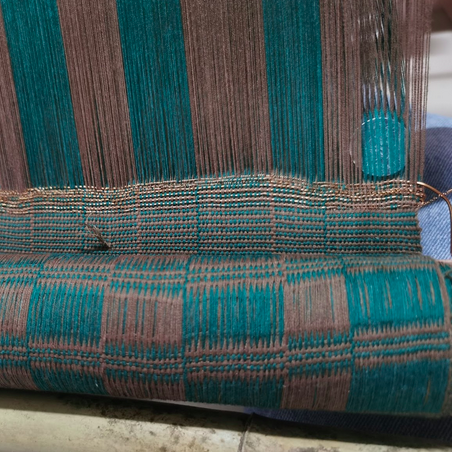
For prototyping the Electronic Textile we used an already started woven piece, metal yarn Zardozi used for embroidery in Iran, India and Central Asia. As it is made from metal - it is conductive, so a traditional yarn turned into a support for new technology.
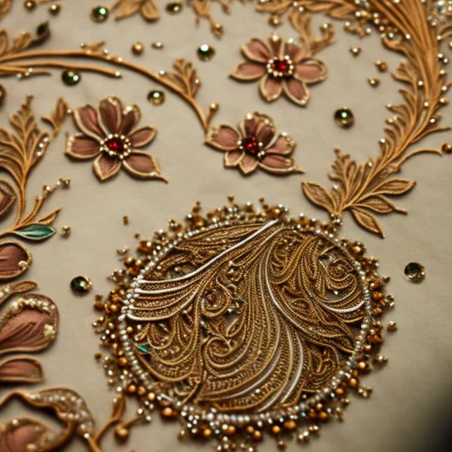

Materials used:
- Zardozi wire-yarn
- Leds
- Coin Battery 3V
- Textile for the battery slot-pocket
- Non-conductive thread
- Needle
In our project, we started with a pre-existing woven Bhutanese textile. We continued weaving while also inserting conductive yarn to create two distinct lines: one for the Anode (positive side) and another for the Cathode (negative side). Additionally, we integrated three LEDs in a Parallel circuit. To power the LEDs, we positioned the battery on the right backside of the textile. We created spirals using wire for the positive and negative sides of the battery. To allow for electricity flow, we enveloped the battery in paper, leaving a hole for the current to pass through.