Make your own accessory
| Path | Target | Duration | Skills |
|---|---|---|---|
| Curiosity | kids 8 to 11 | 2h | Digital Design, 2D Fabrication, lasercutter, Digital Fabrication &Crafts |
Introduction and context
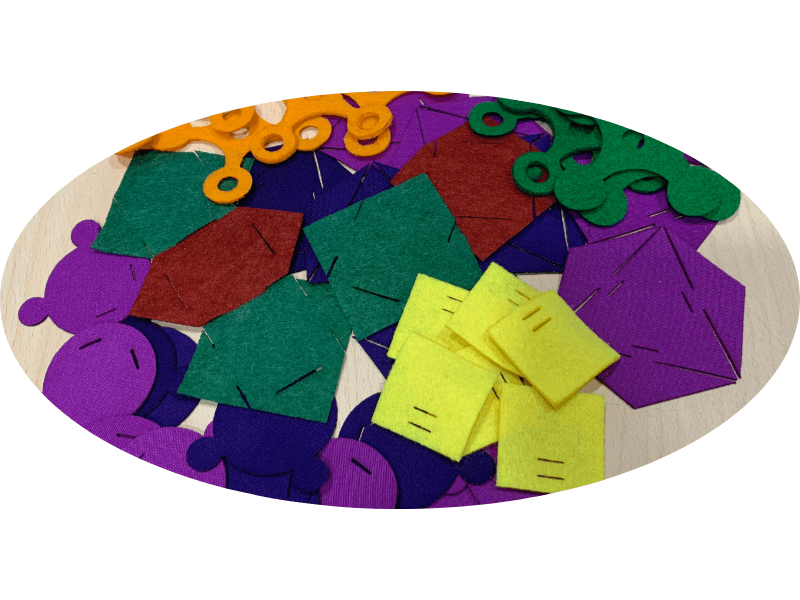
This activity consists in fabricating an accessory assembling laser cut felt modules. Firstly, the participants will design and cut their module using paper and scissors and, secondly, they will learn how to design a module in Inkscape to produce later a series in the laser cutter and interlock them to make an accessory.
Abstract
Circular fashion aims to reduce, recycle and reuse to achieve the least impact on the environment. The fashion industry is the second most polluting on the planet according to the United Nations. The challenge is to reuse and recycle, but not to throw away. “We must transform every element of our take-make-waste system: how we manage resources, how we make and use products, and what we do with the materials afterwards. Only then can we create a thriving circular economy that can benefit everyone within the limits of our planet” Ellen Macarthur Foundation
Intro
For an initial level, this activity can be developed in a “step by step” format where some templates of polypropylene silhouettes are given to the kids to make their first modules. After drawing different pieces they will cut the pieces with the scissors and they will interlock them. In the second part, the participants will try to digital design their modules and laser cut them.
The duration of this complete activity (paper prototyping + digital design + laser cut the modules) is around 2h ( 8 girls) but it will depend on the number of participants and the number of modules they need to create. For smaller kids, they will make simpler accessories such as earrings, a bracelet or a belt.
For a more advanced level, where children have knowledge of digital design, they can follow the power point to learn how to design their own modules in Inkscape.
In this case, it is advisable to divide the activity into 2 sessions, in order to proceed with the cutting of the modules
The ideal number for each group is 8-10 kids. One instructor is needed for each group
Objectives
The activity aims at introducing participants to the circular fashion meaning through a powerpoint presentation with different models of fashion designers that the girls can use as an inspiration.
The purpose of the learning activity is to generate an added value to textile projects
-
Learning Outcomes:
-
Understand why the circular fashion contributes to less polluting fashion
- Get an overview of different shapes to make fabric modules
- Create different pieces that interlock with others
- For advance level:
- Be able to digital design a custom module
- Make a garment or an accessory
Target audience and context of use
Kids, families, educators with interest in learning electrical concepts with simple materials just to learn or to apply this knowledge in the classroom in a ludic way.
For teaching this activity, some computers are needed to make the designs and also the laser cutter. Ideally, each kid has access to a computer
Recommended number of attendees (8-10) per group and instructor
Preparation and materials
Dive into the slides presentation provided in this page, to create the modules. Prepare kits of precut modules for the cases in which the participants only design one of the modules.
Create your team of facilitators and organize some testing sessions and brief meetings for coordinating with facilitators.
Be careful. Check you have all the tools and materials needed and that you will have time to wrap up your tools, set up the logistics for the event room.
Prepare in advance: -Precut polypropylene templates -Precut felt models modules -Scissors, cutter, pencils, rulers.. -Consider to have scissors for left handed people
Equipment, Tools and Materials
- Laser cuter
- 9 computers (for the advanced level),
- 9 tables and 9 chairs (this will depend on covid situation)...
- 1 TV to present the documentation
- Covid-19 individual tray containing:
- Ruler
- Tweezers
- Scissors (+left handed scissors)
- Paper
- Glue
- Wood colour pencils
- Colored markers
Step by Step Instructions
STEP BY STEP overview
- Sketch, design a module with interlocks on paper
- Make a simple module
- Align all the pieces
- Draw the external shape of the group of the pieces
- Cut 3 or 4 pieces on paper
- Assemble the pieces to test the connections
- Design the modules on inkscape
- Save as PDF to cut in the lasercutter
- Lasercut the digital modules
- Connect the modules to make a garment / accessory
- Try to combine different colors
Safety rules & Tips
- Provide special scissors for left handed girls.
- The material need to be safe for the laser cutter (No Cl materials)
- For the younger girls and short time it is better to pre cut the pieces of the modules
- Make sure that an adult supervises the process.
Presentation for the class
Flyer for participants
Downloadables
| Presentation | Brochure | Design |
|---|---|---|
| Presentation | Brochure 1 |
Licence and credits

Attribution — ShareAlike CC BY-SA This activity has been designed by Nuria Robles for shemakes.eu. It is based on Fabricademy´s learning content of fabricademy circular fashion and tMa Foundation and Fab Lab León´s learning experiences methodology.
Related and supporting activities/modules
It can be combined with the other topics of Topic/skills, part of the OS Circular Fashion of the Sustainability Package